Eating Real Food, Frugal Living/ Budgeting, Homesteading, Ways to be More Content

Spring Around the Homestead

  Spring is here! This is a busy time around the homestead, getting ready for gardens and harvesting, new baby animals and weather too darn pretty to be indoors!

spring post1

  We’ve been bottle feeding a few calves, breaking up the garden, planting a few things, burning out the fence rows, and just generally being outdoors enjoying the weather.

DSC_0444

I painted these cute rocks for my potted herb plants. I also made some for my garden, for when all the plants go in. I just painted the rocks, used a fat Sharpie to write on them, then added a coat of spray on clear sealer. I loved quick simple projects that turn out cute!

spring post 5

Here are my two bottle babies! These guys are cute, and I do love caring for them, but I know that come fall, one of them will be feeding my family. Growing your own food can be hard, but knowing what goes into what you eat is an awesome feeling too.

spring post 3

Here’s my son, burning off sections of the fence row. We do this to keep the fences cleaned up, and to reduce ticks and fleas. The fields get burned off too. It just gets rid of the old/dead stuff and makes the grass come back fresh and green. When this gets done we are careful to watch the weather (no wind!) and usually burn off after a good rain, when things are dried out, but not too dry. And of coarse, always having some water nearby.

springpost7

I hope all are having a fabulous Saturday! The weather is beautiful here, and I’m fixing to head out and work on my chicken coop!

What are ways you get ready for spring? I’d love to hear back from you! I’ll be in the jam making mode in a few weeks, as strawberries are starting to come off. Stay tuned for a jam-session!


Eating Real Food, Frugal Living/ Budgeting, Recipes/ How To, Weekly Meal Planners

How to Meal Plan Like a BOSS!

food8edit

Okay y’all, so it’s a weeknight, about 5 pm and you have no idea what’s for supper and you are in a panic. Sound familiar? Yep, we’ve all been there before!

  So let’s talk meal planning. I’m going to give you tips so you can meal plan like a BOSS! You’ll know exactly what meals you have all the ingredients for, what’s fast and easy and what you’re saving for when you have more time in the kitchen.

   To start this meal planning lesson, let’s start right in your kitchen: do a quick mental inventory (or if you’re obsessive like me, jot it down)  of what you’ve already got on hand. This will save you money, you won’t be buying extra stuff you really didn’t need. This list will be our base for the meal planner.

stockpileedit

 Check your freezer, fridge and pantry. Please overlook my messy-ness, apparently I need some help with organizing!

   Once you have your “inventory” list, you’re ready to start planning! Now this is where it’ll be a bit different for everyone: I plan for 6 meals for each week, we usually go out one night a week. When planning, I may jot down specific meals for specific nights, but it can always be swapped around. I try to plan for leftovers, for my lunches. I typically plan 2-3 chicken dishes, 1-2 beef dishes, 1-2 pork dishes and 1-2 “other” dishes (like pizza, hot dogs, tuna sandwiches, fish, etc).

   I keep a list of meals my family likes in a little notebook. I have them categorized by meat type: chicken/beef/pork/ other. I also have them marked with a star if they’re for the slow cooker. If I’m wanting something different/new I turn to my old pal Pinterest! How did we survive without it? I will only add one or two “new” things per week, because my bunch is picky and we tend to stick with old stand-byes. I don’t cook super fancy, we tend to like basic type foods.

DSC_0636

  Here’s my pretty notebook (I’m kind of a notebook geek, I have way too many!) that I keep meals we love written in. This little step makes meal planning much quicker.

  The last step is matching up meals with what you’ve got and making your grocery list. So just based on my inventory (as seen in above pics) I’ll jot down a quick plan:

1. Chicken Fajitas

2. Marinated Grilled Chicken and Grilled Asparagus

3. Pulled Pork sandwiches and Potato Wedges

4. Green Chile/Pork Nachos

5. Meaty Italian Sauce with Spaghetti Squash

6. Tuna/Egg Salad with Veggies and Dip

   Now I would look at each meal and see what components I was missing, grocery shop once for those items and be eating for the week!

   Here’s a link to a weekly meal planner template that I love! It has spots for planning breakfasts/lunches too! And a grocery list on the side. I keep one printed out and use them.

https://www.vertex42.com/ExcelTemplates/meal-planner.html


   There you have it! No more wondering  “What’s for dinner?”. And no more looking forward to a specific meal, then not having all the ingredients for it on hand. By planning out meals, it’ll save you stress, time and money.

  I hope you all have a very blessed day! If you have questions/comments I would love to hear from y’all!

Eating Real Food, Recipes/ How To

Winner Winner Chicken Dinner???

So I had some chicken and wanted to try something new- turned to trusty old Pinterest for some inspiration. I saw a one dish chicken and veggies that took just about an hour to bake, didn’t call for crazy weird ingredients and could be easily modified.

So here is my gathering of the ingredients:

DSC_0055

I decided to go with potatoes and broccoli for the two side veggies. I seasoned all well with a season salt type seasoning, some onion flakes and some jarred garlic. I mixed all this in a small bowl with a few TBSP melted butter and a few TBSP olive oil. I placed my chicken and veggies in the pan and drizzled with the season mixture. Topped with foil and baked for 30 minutes like that.

DSC_0056

Here’s what it looked like going into the oven. After 30 minutes I added a small pkg of bacon pieces and about 4oz shredded cheddar. Covered with foil and baked another 30 minutes. (and yes- I know those fake bacon pieces are terrible for you-it’s all about balance! This dinner is mostly “real” and healthy. You could omit the bacon and cheese if you wanted)

So, I didn’t get an “after” pic- hubby dug into it! He liked this much better than I did. It was just an “okay” for me.

The chicken wasn’t flavored as much as I would’ve liked and was a bit dry. The broccoli was mushy and the potatoes were really good.

So, I will be playing with this concept- just changing it up a bit! I am going to attempt it again- only next time I will marinate my chicken overnight in Italian dressing, I will use fresh chopped onions, and will only bake the potato chunks on the side (I will just steam my broccoli like I usually do).

So- trial and error! The story of my life! Stay tuned for a much better (fingers crossed) version of this bake!

In life we all have some ups and downs, some great successes and some super flops! Learning from our flops is the key! I hope all have a super Blessed week! It’s a cool rainy day here- feels like fall! God Bless!

Eating Real Food, Recipes/ How To

Healthy Black Bean Burritos with Quinoa

DSC_0140

Looking for a filling, healthy, yet still super yummy supper? Look no further! You’ll get a whopping 2 big burritos per serving for around 500 calories.

These burritos are packed with protein, they’re filled with ground turkey, black beans, quinoa,salsa, and a bit of shredded cheddar.

DSC_0137

I started with cooking and crumbling 8oz  lean ground turkey,added some dry onion flakes, minced garlic and a dash of fajita seasoning.Then I drained and rinsed a can of black beans and added to the skillet. I then added about 1/2 cup cooked quinoa and about 1/2 cup salsa.This mixture was heated through.

I used whole wheat tortillas, filled each with about 1/4 cup filling and added 1 Tbsp shredded cheddar cheese. These were so filling!!

Hope all are having a super summer- it’s winding down!! I go back to work tomorrow- then school starts next week. My daughters’ wedding is also just 6 weeks away, so it’s getting hectic around here!! May all have a blessed week!!

Eating Real Food, Homesteading, Recipes/ How To

Home Canned Salsa- Eating Real Food

DSC_0026

So it is that time of year- all those luscious fruits and veggies are coming off by the bushel! Time to do some preserving. Time to tromp out to the storage building and dig out my canning stuff. Time to heat up the kitchen for a good cause. Time to make some real, yummy foods!

Now this day I made homemade salsa to can. I am planning to can diced tomatoes later this week. Then some peaches later in the summer.

DSC_0025

Look at all that yumminess! Around here we go through a lot of salsa, and homemade is always better! My bunch had to have a bowl fresh before I started to can it up!

Now we all have an old standby when it comes to canning or even just salsa making, here’s mine:

Ripe tomatoes, blanched/peeled/chopped

Fresh Jalapeno, finely chopped (seeds removed)

Bunch of fresh cilantro, chopped fine

Yellow onions, finely chopped

Juice of a lime or two

Salt

I start by blanching (just dropping into boiling water/followed by a dunk into ice water) my fresh tomatoes, then slip the skin off, core and chop into very small dices. Wash and chop all other ingredients. I use about 8c chopped tomatoes to every 3 small/medium peppers, 2 medium onion and a bunch of cilantro. I mix in a large bowl and taste. Now it seems a bit bland- but I add my salt to each jar so I know they each have the exact right amount needed to preserve them. I use 1/2 tsp salt per pint jar, added right before placing the hot band/lid on top.

They then go into my pressure cooker to be pressure cooked for 25 minutes. Let cool on the counter on a towel.

Don’t let a pressure cooker intimidate you- just read the instructions carefully when using one. I do not use mine for cooking- although I know people that do. I bought mine strictly for canning.

Hope all have a Blessed week! I am finishing up a few wedding projects this week and getting ready to go back to school!

Eating Real Food

Cheesy Quinoa Bites- A Great High Protein Meal or Snack!

Okay, so still on the quest to eat better- still struggle- but marching on! I really need to stop eating out so much, because when I say “I’ll just get a salad” , what I mean is when I walk in the door and see steak and a loaded baked potato, the salad idea goes right out the window!

I found this recipe on Pinterest (how did we cook/organize/raise children/ sew/craft/ ANYTHING before Pinterest? Not sure, but I find some great stuff on there. )

I found these yummy little bites here: http://www.southerninlaw.com/2013/03/cheesy-quinoa-bakes-recipe.html

Now her pics look much better than mine, but you get the idea!

DSC_0023

I tweaked the recipe just a bit, these are very versatile and could be flavored any way you like. I added a few ounces of diced smoked ham and cheddar cheese.

DSC_0021 - Copy

I baked mine in this fluted mini bundt pan sprayed well with cooking spray. I had no problem getting mine out. The recipe made 12 of these, which I serve 3 per serving at around 220 calories and a whopping 18g protein per 3.

DSC_0022

This was a great breakfast that is super filling and yummy. I love finding higher protein real food recipes that I love.

Here’s the recipe adapted my way:

3/4 c cooked quinoa

2/3 c egg whies (about 5 to 6 large)

1c shredded zuchini squash (could use other veggie- thinking broccoli would be great finely chopped)

2/3c shredded sharp cheddar cheese

2oz smoked deli ham (could use any meat- smoked turkey, sausage,etc)

1tsp Mrs Dash Onion Herb seasoning

1tsp dried onion flakes

dash salt/pepper

Mix all together, spoon into muffin tin or mini bundt that’s been well sprayed with cooking spray (or use some coconut oil and oil well). Bake at 350* for around 20 minutes (I did mine for like 18, but in the future would cook a bit longer, maybe 20-22 min) Remove from pan to plate. Enjoy!!

These will be a great make ahead breakfast for the work week. Would even be good for lunch or a mid-morning snack.

I hope all are having a fabulous summer- it’s been hectic here! I am getting ready to be back at school- missing my awesome co-workers! Planning to make and can some salsa later today- we just love salsa and my garden (should say hubbys’ garden- he does all the hard work!) is producing gaggles of delicious tomatoes.

Have a blessed day!!!

Eating Real Food, Homesteading, Recipes/ How To

Strawberry Jam Time!

DSC_0008

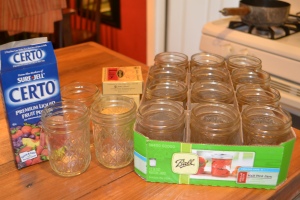
Gathering my supplies! Now I know some people say that canning is expensive, and to get started, yes it is, but many of the supplies can be used over and over again. I have had my large hot water bath canner, pressure cooker, jars, wide mouth funnel, and rubber coated jar tongs for many years and will use them for years to come. The things that must be replaced yearly are really just the lids, I re-use my bands as long as they are free from any rust or dents. The lids are fairly inexpensive to replace yearly, a few dollars a dozen around my area. I also use the pectin when making my jellies and jams, which is a bit expensive. (I usually use the powdered pectin, but the store was out so I tried this gel pectin this time)  The fruits/veggies you use can be cheap or free, depending upon where you get them. A friend gave me a huge box of mulberries a few years ago, so the only cost in the jelly was my lids and pectin, which was a total of around $4 for around 15 jars of jelly.

Now you can make jams and jellies without adding the pectin, because pectin is a naturally occurring substance in many fruits, it just makes it a bit quicker and the jams/jellies set up nice. I just follow the directions on the package of the fruit pectin for my jam. The store bought pectin is safe and natural, made from apple pectin.

Now to preserve those delicious summer berries!! (Peaches to follow later this summer!)

DSC_0011

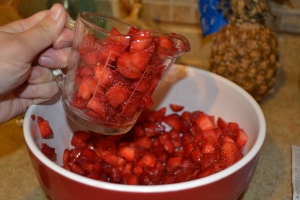
I like my jam chunky, so I leave my berries in small chunks and mash just a bit as it boils and cooks down.Measure out the washed/cut up fruit into a large saucepan. Add the sugar and let sit for a bit. The recipe I use is here:

http://www.kraftrecipes.com/recipes/certo-strawberry-jam-52127.aspx

DSC_0016

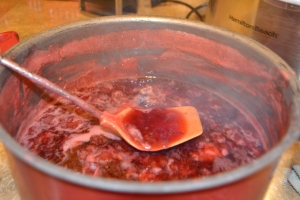
I do not add the butter, I just use a spoon and skim off the foam that forms on the top.

DSC_0024

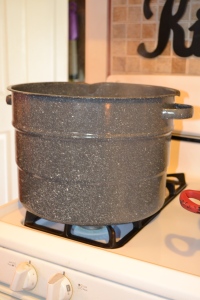
I go ahead and begin bringing my water in my big pot to a boil, because it takes a while. My canner has a rack in the bottom, so the jars are not sitting directly on the bottom of the pan.

DSC_0017

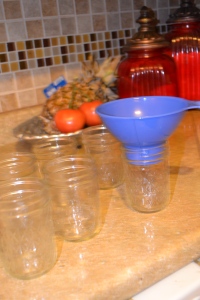
I use the small jelly jars, because it seems fresher to open a new jar more often. They are also very pretty for gift giving! A large mouth funnel is a must for jam/jelly making, I bought mine at a local dollar store for a few bucks years ago.

DSC_0019

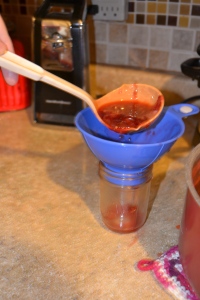
Once the jam has cooked according to the directions, ladle it into the jars, leaving a space at the top of the jar. Wipe off the rims of the jars to ensure a good seal.

DSC_0025

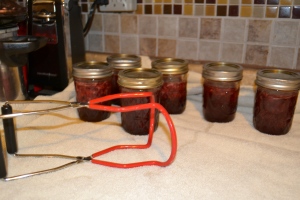
The rings and lids should be placed into boiling water, then using tongs place on the prepared jars of jam, I use a dish towel to tighten them down, as they are very hot. Then using my handy dandy jar tongs, I carefully place the jars into the boiling water canner rack and boil the specified time. When I remove them from the canner, I place on a clean dry towel on my counter, they will start popping (sealing) within a few minutes. Always check to make sure they’ve sealed, if they do not seal, just place in fridge to use first.

DSC_0026

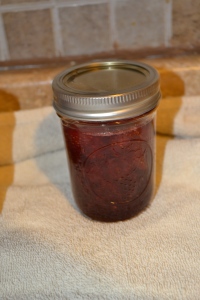
Now it’s time to eat it! If your family loves strawberry ice cream topping or topping for waffles and pancakes, you can just leave out the fruit pectin( or cut in half the amount) and make yourself some topping. My family loves this! Make it just the same, just without (or less) pectin. It will not set up like jam, but will be pourable, perfect for toppings!

Summer break for school has officially begun (although I have a few more days to work in my office) and I am so excited for summer! We are planning a few short trips this summer and I am so ready! I hope all have a very blessed week ahead!!

Eating Real Food, Recipes/ How To

Brownies That are Healthy? Shut the Front Door!

Okay so I love a good brownie, a peanut butter brownie, a hot fudge brownie, a cream cheese swirl brownie,well you get the idea. So, since I am on the quest for better health through better nutrition, I sought out a healthier version of brownies, so I could have my cake and eat it to- so to speak.

Pinterest to the rescue! It brought me a ton of options for healthier brownies, one of which was Black Bean Brownies. So I sorted through a bunch of those and narrowed it to just one to try, and the results were a hit!

DSC_0014Right out of the pan- hot and fresh!

So I went here to find the original posters recipe:   http://mmmisformommy.com/2011/05/legendary-black-bean-brownie.html

I then tweaked them a bit more, for my families preferences and the reduce sugar further.

With the recipe I include below, cut into 16 squares, each brownie has roughly 90 calories, 3g protein, 3g fat and 1g fiber. I liked these, granted they are not a hot fudge brownie, they also do not have 250 calories, a ton of fat and no other “good” nutrients.

DSC_0006 Ready- Set- Bake!!

Black Bean Brownies

1 can Black Beans, unseasoned, well rinsed and drained                             3 eggs

3 Tbsp Coconut Oil (or vegetable oil)                                                         2/3c sugar

1/4c cocoa powder                                                                                   1 tsp baking powder

1/4tsp salt

In a blender or food processor, puree rinsed/drained beans, coconut oil and eggs until smooth. (I used my Magic Bullet) In a mixing bowl combine cocoa, sugar, salt and baking powder. Add the bean mixture to the dry ingredients. Mix until well combined.

Pour into a greased 8×8 square pan. Bake at 350* for about 30 minutes, or until tests done in middle. Cool and cut into 16 even squares. Enjoy the yumminess!

DSC_0015

I shared these with my co-workers and most liked them, some thought the texture was weird. I also made them for a school fair to focus on nutrition and most of the kids liked them, though again, some did not. The kids were ages pre-k through 6th.

I hope all have a very blessed upcoming week! We have this week and next until summer break!

Eating Real Food, Homesteading

Food Review: Roasted Rabbit

Okay so a month or so ago we bought rabbits to raise for meat, even though we’d never tried it before. (A little nutty- I know right?) So we bought what we thought were 2 females and a male, only to end up with 2 males and a female. We bought another female to make up for that, and had the extra male we didn’t really need.

This particular male was just around 4 months old and was around 4-5lb. Now after butchering and dressing him out, he weighed around 2 to 3 lb. Raising rabbits for meat is a very economical way to eat healthy, fresh food that you know where it came from, how fresh it is, what it’s been fed, and who has handled it.

DSC_0056

Now I know a lot of people say they are squeamish about eating such a cute animal, but I have no more problem feeding my family rabbit than I do chicken/beef/pork or any other meats. Our next project is to get some sheep to have our own fresh lamb!

So I took the dressed out rabbit and seasoned it with a local seasoning called “Magic Chick Dust” and some onion flakes also. Placed it into the slow cooker with a bit of chicken broth in the bottom, Cooked all day on low and it was fall apart tender when I got home. I picked it off the bone and had enough meat to feed my family dinner. (I had made some cheesy rice and some honeyed carrots to go with it.) This would also be enough meat for a casserole or soup too.

So what’d it taste like, inquiring minds want to know? Like chicken, yes it tasted much like chicken, which was what many people had told me. I did not have my camera out, so I forgot to snap any pics, but picture a plate of shredded roasted chicken and that’s what it looked like.

So we will be eating more rabbit as we grow them off. We have babies right now that are a few weeks old and are growing off quite quickly. We also have our other female we thought was expecting, but thinking not now. So she will go back in with our male for awhile.

The garden is in full swing with: potatoes, onions, tomatoes, squash, lettuce, and bell peppers. Going to add some broccoli and cauliflower this weekend.

Hope you are having a wonderful week- mine has been quick, but good so far. Have a blessed day and weekend!!

Eating Real Food

Real Food in Real Time- 30 minutes to the Table

DSC_0019

Look at that beautiful plate of real food, yummy! It was prepared in just 30 minutes and was super healthy and delicious and fairly frugal too.

I started with a pound and half of chicken tenders ($1.99/lb, so $3), a pound of asparagus ($1.99), 8oz mushrooms ($1.29), and 1/2c dry quinoa  (maybe $1 worth, bought the bag at Aldis).Also used a 1/2 bottle of Italian salad dressing to marinate the chicken and some olive oil and spices. So my grand total is around the $9 mark to feed a family of four a healthy, real meal.

DSC_0003Prepping the veggies!

I started by throwing the chicken tenders into a baggie of Italian salad dressing overnight while it thawed out. (Now I know this could be a healthier, more “real” food option, but I like the taste of this and it’s so quick! Sorry!) Then when I got ready to cook dinner, I tossed the chicken onto the grill, cooked for around 10 minutes on the first side. While that was going, I rinsed my quinoa and got it cooking (per package directions, just using water and salt). I prepared my asparagus and tossed it with a little EVOO and some garlic salt. While I turned my chicken over, I added the asparagus to the grill (my grill has very small grates- if yours doesn’t you could use a grill pan for this).

DSC_0004This is the quinoa that I bought at Aldi.

Now the quinoa was almost done so I sliced up my mushrooms (after cleaning). Once the quinoa was done, I tossed it along with the mushrooms and some seasoning into a skillet. Let it cook until the mushrooms were a bit tender.

DSC_0009 Yummy!

Now I went back to the grill and found this deliciousness!

DSC_0007Wish ya’ll had smell-i-blog- cause’ it smelled so good!

So there you have a great meal that is real food in just around 30 minutes! If you have questions or comments I would love to hear from you!!

I hope all are having a super week so far- mine is going great! God Bless!